Hello I am Daniel Hunter from Southlands School, where I have just finished my GCSEs. I recently spent two weeks at Embecosm for work experience. My main task was to build an autonomous car with sensors.
Shrimping.it
The Shrimp is an alternative to the Arduino Uno, with a component cost of around 10% of the price of an official Arduino board, which makes it ideal for someone just starting out in electronics and computing.
My first task at Embecosm was to build a blinking light circuit.
I did this by connecting the LEDs and resistors to the correct pins, and added a 16MHz crystal to help the computer function properly (so it would execute 16 million clock cycles per second). I then programmed it using the Ardunio IDE. I managed to get my light blinking in a matter of seconds. Since I found it fun and simply enough to program, I next decided to make it into a traffic light system with red, yellow and green LEDs, which was a great success.
I then developed it into a persistence-of-vision display (shown above), which flashes the LEDs on and off very fast, so that when you wave them they spell out a message.
Cuttlefish
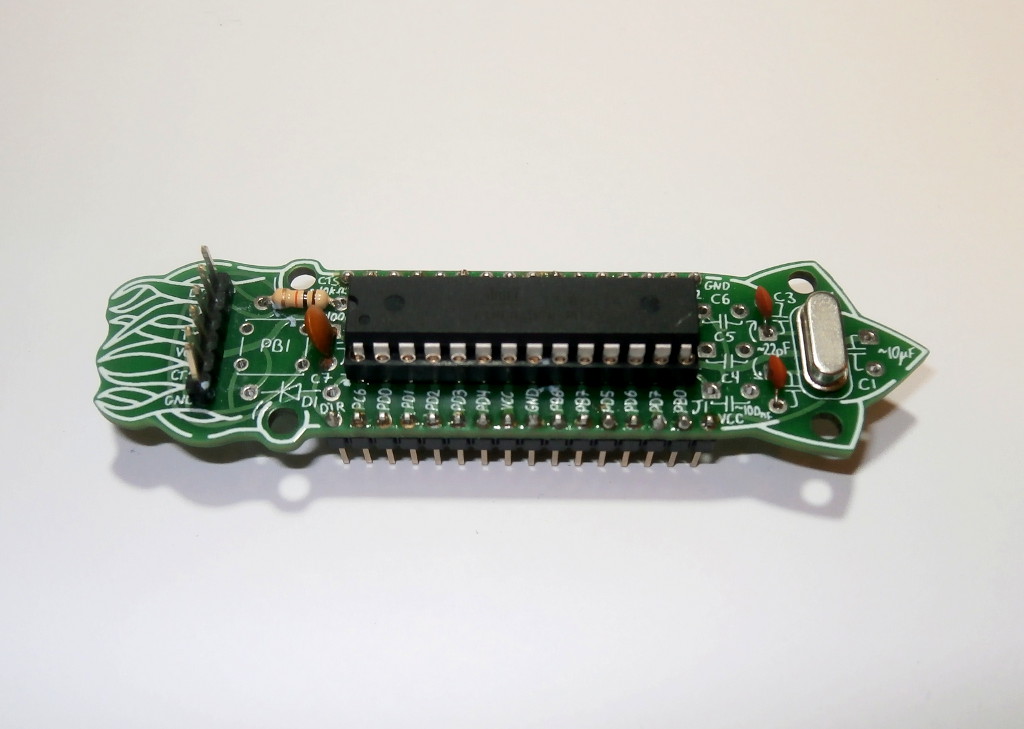
The Cuttlefish is a PCB version of the Shrimp that is designed for use in both breadboard prototyping and more permanent projects, including header pins for the former and mounting holes for the latter. The Cuttlefish PCB was designed by Saar Drimer at Boldport.
On my fourth day I was already soldering a cuttlefish board – which required a steady hand and the right equipment. We had a temperature controlled soldering iron, an extraction fan for fumes and used lead-free solder. The components we had to solder included:
- A 28-pin socket for an ATMega32
- 10μF 50V electrolytic capacitor
- 6mm tactile switch
- 22pF 50V ceramic capacitor (2 off)
- 100nF 50V ceramic capacitor (4 off)
- 10K 0.125W resistor
After I soldered all the components to the correct pins, I tested it by adding an LED and using the same method as the blink circuit to check if it works.
A Cuttlefish is a small, easily programmable computer and is quite powerful despite its size.
Programming an LCD display
The 1602A display is an industrial character type LCD, that can show 32 characters (16 column x 2 line). Key features are:
- Display Format: 16 Character x 2 Line
- Input Data: 4-Bits or 8-Bits interface available
- Display Font : 5 x 8 Dots
- Power Supply : Single Power Supply (5V±10%)
- Backlight for screen
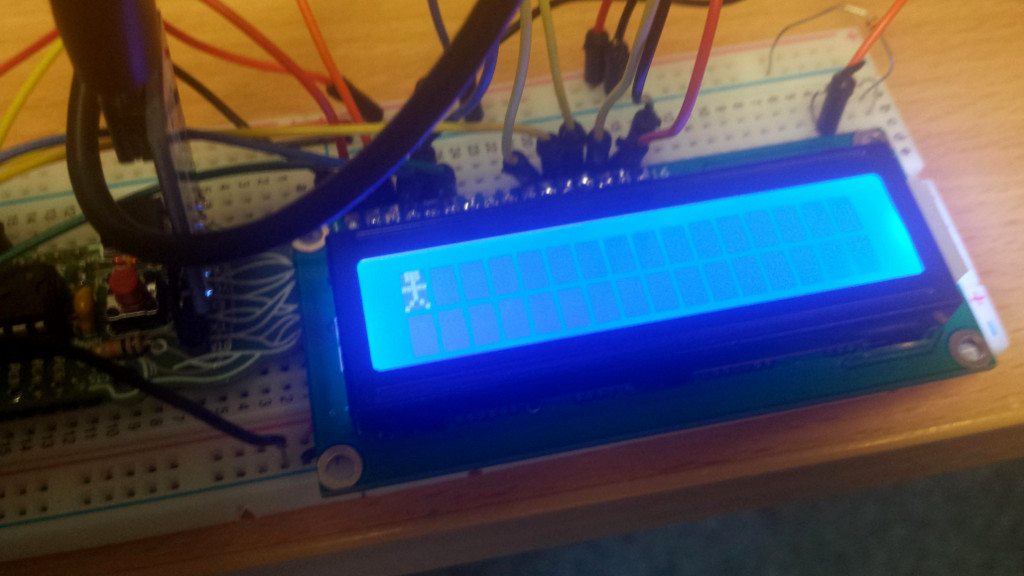
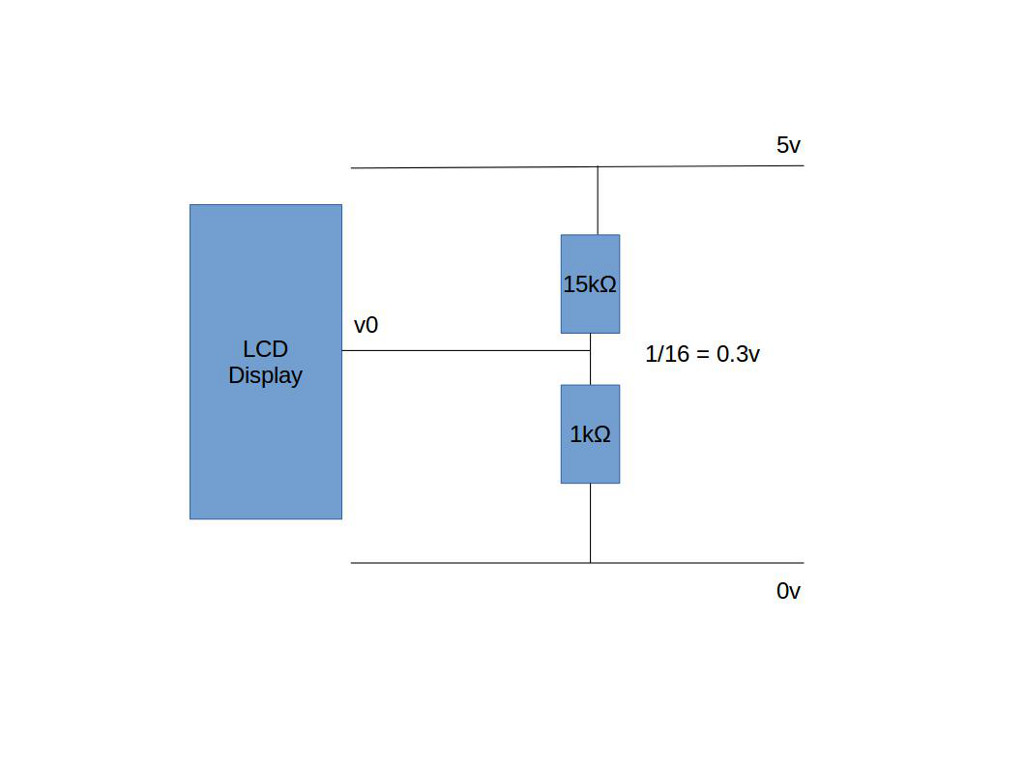
For this exercise we connected the enable, rs, rw and data pins d0-d3 to the Cuttlefish. We provided power and ground connections. Finally we used a resistor bridge to connect the v0 pin. This controls the contrast. Too high and the background always shows, too low and the foreground always shows. Initially we used a resistor bridge as follows:
This gave us approximately 0.3V, which still made the background too bright. We then replaced the bridge with a potentiometer and found a voltage of between 1.0V and 1.5V was optimal. So our final version used two diodes in series, since each had a drop of just over 0.5V, giving us just over 1V for the v0 pin.
The sensor car
This is an example of how you could wire up an Arduino to everyday electronic equipment.
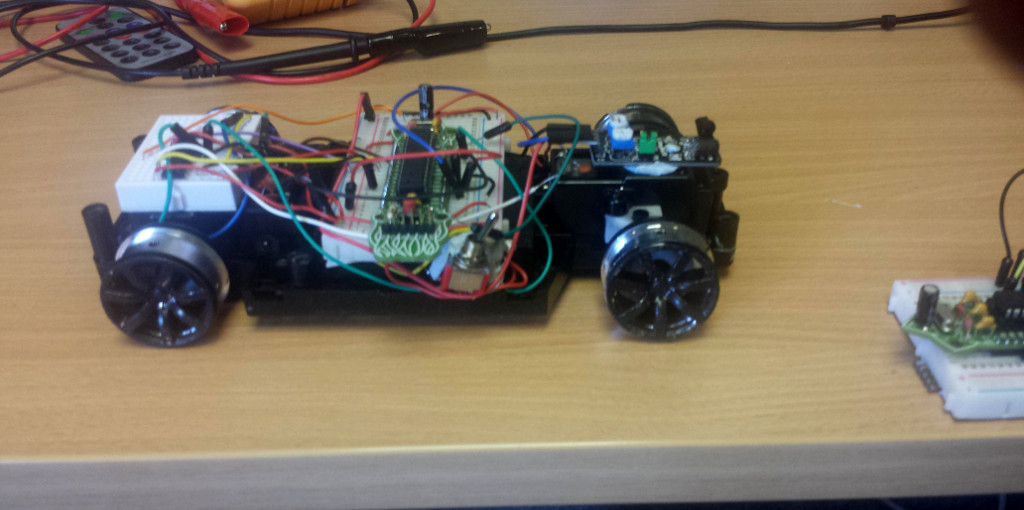
Firstly, I did this by using a Cuttlefish. We inserted an ATMega328 into the breadboard and added a quad H-bridge chip to allow it to control the power needed by the car. I also found we needed to stabilize the voltage by adding some capacitors and resistors to the breadboard. Then we added an LED and a diode to test it after it was programmed.
When we first tested the car it had some power but not enough,so I researched the voltage problem and I eventually got it working by remove the led which turned out to be lowering the voltage by too much (unlike a standard diode, and LED can have a voltage drop of 1.8V or higher).
On my second day at Embecosm I had successfully built a sensor car and blinking light circuit, and learned the basics of Arduino programming in a matter of minutes.
An introduction to Silicon chip design
Chip Hack aims to provide a gentle introduction to FPGA programming using the Verilog hardware description language (HDL) and is:
- a set of learning materials and workshop notes;
- an event.
No prior experience with HDLs and FPGA workflows is assumed, but some programming experience and an understanding of basic digital electronics is required. An FPGA is a type of silicon chip, whose design can be configured from a computer.
I was using the application note Silicon Chip Design for Teenagers by Dan Gorringe. I was fortunate that Dan was also working with Embecosm, so could show me how to do things.
Dan’s application note shows how to get several projects running, covers some core computer theory and finally gets a complete OpenRISC system running on the FPGA.
State machine using DE0-Nano
A state machine is any device that stores the status of something at a given time and can operate on input to change the status and/or cause an action or output to take place for any given change.
After installing the Quartus design software (1hour later) we started with some existing Verilog code. We then modified this code and installed the design on the FPGA of the DE0-Nano.
Conclusion
My time at Embecosm has been great and it has been real learning curve for me. I would most definitely recommend work experience for those interested in computing.


